User guide
ConnectIQ Odoo Guide: Multi-Channel Sync Cockpit & AI Diagnostics
A practical user guide to ConnectIQ for Odoo 19 and 20. It covers installation, AI key setup, the unified cockpit, queue telemetry, safe retries, AI error diagnosis, limitations and common questions.
KalvyAI Engineering · · 8 min read
ConnectIQ (technical name ki_connecter_iq) is an Odoo module that pulls your e-commerce connectors into one cockpit. It shows sync telemetry across orders, feeds, inventory and background queue jobs. When a sync fails, it can send the error to an AI model and return a plain-English diagnosis with suggested steps to fix it.
This guide explains what ConnectIQ does, who it is for, how to install and configure it, and how to use each main feature.
You can buy and download ConnectIQ from the store page: ConnectIQ on the KalvyAI Store.
What ConnectIQ is for
A business that sells on more than one storefront usually has more than one connector module running in Odoo. Each connector has its own logs, its own queue and its own error messages. When something breaks, someone has to work out which store failed, which job is stuck, and what a long Python traceback actually means.
ConnectIQ sits on top of those connectors and gives you:
- One dashboard for instances, orders, products and feed metrics across Shopify, WooCommerce and custom adapters.
- Live visibility into pending, running, failed and completed background jobs.
- AI analysis of sync errors, with credentials redacted before anything is sent to the model.
- A safe retry for failed jobs that is designed not to create duplicate orders or stock spikes.
- A permanent log of past issues, their diagnosed causes, the fixes applied and when they were resolved.
ConnectIQ does not sync stores by itself. Each storefront still needs its own connector module. ConnectIQ is the monitoring and diagnosis layer.
Who it helps
- Business owners who want one place to check whether all stores are syncing correctly.
- ERP admins who handle failed jobs and need to know quickly what went wrong and whether a retry is safe.
- Developers who maintain connectors and want readable root-cause summaries, a history of past failures, and an adapter framework for adding custom marketplaces or legacy ERP connectors.
- Groups with several legal entities that run separate storefronts per company and need data kept apart.
Requirements
Before installing, check that you have:
- Odoo 19.0 or 20.0, Community or Enterprise, hosted on Odoo.sh or your own server.
- At least one e-commerce connector, for example
ki_odoo_shopify_connectororki_odoo_woocommerce_connecter. - An API key for Google Gemini, OpenAI or Anthropic Claude. Free or paid keys both work. Gemini free tier keys are supported.
ConnectIQ depends on these Odoo modules, which are installed automatically if missing:
- Base (
base) - Sales (
sale) - eCommerce (
website_sale)
Odoo Online (SaaS) is not supported. Custom modules need Odoo.sh or a self-hosted server.
Installation
Step 1: Get the module
- Go to the ConnectIQ store page and complete the purchase.
- Download the module package. [CHECK: download format and delivery method after purchase]
Step 2: Add it to your addons path
Self-hosted: copy the ki_connecter_iq folder into a directory listed in your Odoo addons path. If you use a custom addons directory, make sure it is in your config file:
[options]
addons_path = /opt/odoo/odoo/addons,/opt/odoo/custom-addons
Restart the Odoo service afterwards.
Odoo.sh: commit the ki_connecter_iq folder to your project repository, the same way as any other custom module, and push to the branch you want to deploy.
Step 3: Install from Apps
- Log in as an administrator.
- Turn on developer mode.
- Go to Apps and click Update Apps List.
- Remove the default "Apps" filter from the search bar and search for
ki_connecter_iqor "ConnectIQ". - Click Install.
On a self-hosted server you can also install from the command line:
odoo -c /etc/odoo/odoo.conf -d your_database -i ki_connecter_iq --stop-after-initMake sure your connector modules (Shopify, WooCommerce or others) are installed too. Without at least one connector, the cockpit has nothing to report on.
Setup
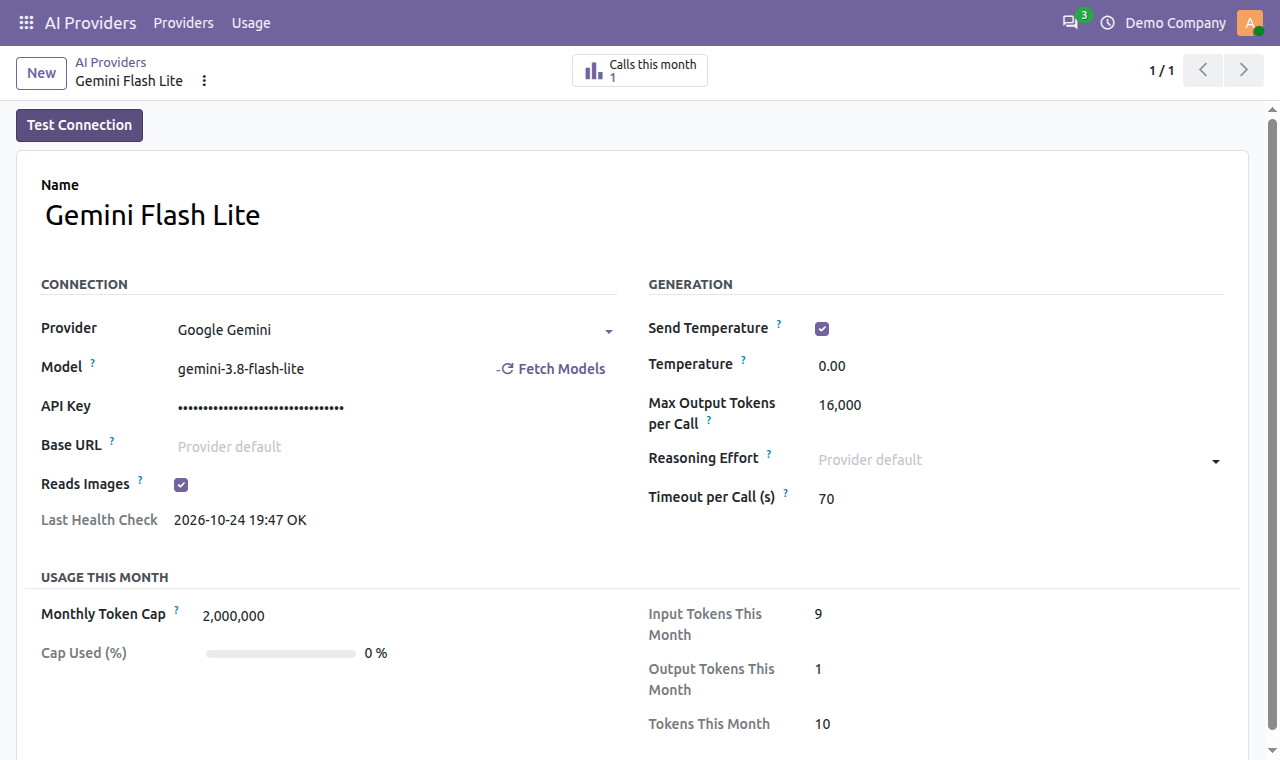
Enter your AI diagnostic API key
- Go to ConnectIQ > Settings.
- Paste your Gemini or OpenAI API key into the API key field. [CHECK: field name and whether a provider selector is shown]
- [CHECK: how to select Anthropic Claude as the provider, and whether its key goes in the same field]
- Save.
Treat this key like a password. Only administrators should be able to see or change it. [CHECK: which security groups can access ConnectIQ > Settings]
Set up user access
Decide who should use the cockpit. Typical roles are an ops lead who watches the dashboard and an admin who retries jobs and runs diagnoses. [CHECK: security groups provided by ConnectIQ and what each one allows]
Multi-company setup
If you run several companies, ConnectIQ follows Odoo's multi-company rules. Users only see data for the companies they are allowed to access. Check each user's allowed companies in their user settings before giving them access to the cockpit.
Using the main features
Unified multi-channel cockpit
The cockpit is the starting point. It brings together instances, orders, products and feed metrics from every active connector.
- Open ConnectIQ Dashboard. [CHECK: exact menu path to the dashboard]
- Review the live health indicators and the sync status for each store.
- Look at the queue section to see how many jobs are pending, running, failed or completed.
- Open a store or metric to drill into the related records. [CHECK: which cockpit tiles or cards are clickable and what they open]
A good habit is to check the cockpit at the start of each day and after any large catalog or price update.
Queue job telemetry and health
Connectors usually do heavy work, such as importing orders or pushing stock levels, in background jobs. ConnectIQ shows those jobs and their throughput.
- From the dashboard, open the queue view. [CHECK: menu path to the queue job list]
- Filter by state: pending, running, failed or completed.
- Watch throughput. If pending jobs keep rising while completed jobs stay flat, something is blocking processing. That could be a webhook bottleneck or a worker that is not running.
- Open a failed job to see its error details.
AI sync error assistant
When a job fails, the raw traceback can be long and hard to read. The AI assistant explains it.
- Open the failed sync or job record.
- Click Diagnose with AI.
- Read the result. It includes a plain-English root cause and step-by-step resolution advice.
- Apply the suggested fix. [CHECK: whether fixes are applied automatically by a button or followed manually by the user]
- Once the cause is fixed, retry the job (see below).
For example, a traceback about a missing field value on a product might come back as "the product exists in the storefront but has no matching SKU in Odoo", with steps to map or create the product. The actual wording depends on the error and the AI model.
AI output is advice. Read it before acting, especially if the suggestion touches accounting, taxes or stock.
Sensitive token redaction
Before an error payload is sent to the AI provider, ConnectIQ runs a regex-based sanitization layer. It strips API keys, authorization and Bearer tokens, customer passwords, credentials and sensitive headers.
You do not need to switch this on. It runs automatically before each diagnosis. [CHECK: whether the redacted payload can be previewed before sending]
Pattern-based redaction removes the formats it is built to recognize. If your connectors put unusual secrets into error messages, such as custom header names, test a diagnosis on a sample error first. [CHECK: whether custom redaction patterns can be added]
Zero-collision safe retry
Retrying a failed order import should not create a second order. ConnectIQ's retry is idempotent, so a failed job can be re-executed without generating duplicate orders, duplicate accounting records or stock spikes.
- Open the failed job.
- Fix the underlying cause first, using the AI diagnosis if needed.
- Click the retry button. [CHECK: exact button label]
- Confirm that the job moves to pending or running, then to completed.
If a job fails again with the same error, the cause has not been fixed. Diagnose again instead of retrying repeatedly.
Historical AI diagnostic logs
Every diagnosis is kept in a permanent audit log. Each entry records the sync issue, the diagnosed cause, the applied fix and the resolution timestamp.
- Open the diagnostic log. [CHECK: menu path to historical AI diagnostic logs]
- Search by store, error or date to find earlier cases. [CHECK: available filters and group-by options]
- Use past entries to spot recurring problems, such as the same product mapping error every week.
The log is also useful for handovers. A new admin can see what failed before and how it was fixed.
Multi-company isolation
ConnectIQ enforces multi-company rules so data from one legal entity is not shown to users of another. A subsidiary's storefront errors, orders and logs stay inside that company. Use Odoo's company switcher to move between companies you have access to.
Extensible adapter framework
ConnectIQ has a modular adapter registry. Developers can add custom marketplaces or legacy ERP connectors so they appear in the same cockpit. [CHECK: developer documentation link and the adapter interface that must be implemented]
Tips
- Fix, then retry. Retry is safe against duplicates, but it will not fix the cause of the error.
- Start with a free Gemini key if you want to try AI diagnosis before committing to a paid provider.
- Review AI advice before changing tax, pricing or accounting settings.
- Check the history first. A recurring error may already have a documented fix in the diagnostic log.
- Watch pending job counts after big imports or price updates. A growing backlog is an early warning.
- Keep connectors updated. ConnectIQ reports on what your connectors do. It cannot fix a bug inside a connector by itself.
Limitations
- No Odoo Online (SaaS) support. Use Odoo.sh or a self-hosted server.
- Not a connector. Store syncing needs the relevant connector module for each channel. ConnectIQ provides telemetry, diagnosis and retry on top.
- AI needs an external provider. Diagnosis uses your own Gemini, OpenAI or Claude key, so the provider's terms and usage limits apply.
- Versions. Supported Odoo versions are 19.0 and 20.0.
FAQ
Does ConnectIQ replace Shopify or WooCommerce connectors?
No. It sits on top of your existing connectors as a cockpit, unifying telemetry and adding AI error resolution.
Are our API keys or customer data exposed to the AI?
ConnectIQ automatically runs a regex sanitization layer that strips secrets, passwords, Bearer tokens and sensitive headers before an error is sent for diagnosis.
Can I retry failed syncs directly from ConnectIQ?
Yes. The safe retry requeues failed jobs without duplicating accounting or inventory records.
Which AI providers are supported?
Google Gemini (including free tier keys), OpenAI GPT-4o and Anthropic Claude.
Does it work with Odoo Community?
Yes. ConnectIQ supports both Community and Enterprise on Odoo 19.0 and 20.0.
Where do I buy it?
On the ConnectIQ store page.
How KalvyAI can help
We build and connect Odoo, ERPNext and Shopify systems, and we add AI agents that work inside them with human approvals, budgets and an audit trail. We can install and configure ConnectIQ, connect your Shopify and WooCommerce stores, build custom adapters for other marketplaces, or review a sync setup that keeps failing. Contact us to talk through your setup.
- User guide
- Odoo
- ConnectIQ
- Shopify
- WooCommerce
- AI Diagnostics
- E-commerce Sync
- User Guide
KalvyAI Engineering · Engineering team
The engineers who build, connect and fix business systems at KalvyAI: Odoo, ERPNext, Shopify and AI agents that work inside them with approvals, budgets and an audit trail.
Comments
No comments yet. Questions and corrections are welcome.
Rate this post or leave a comment